

DIY Acrylic Customizable Monthly Calendar
This blog post may contain affiliate links. As an Amazon and Rewardstyle affiliate, we may earn a small commission for any purchases made through these links. Click here for the disclosure statement.

DIY Large Wall Calendar
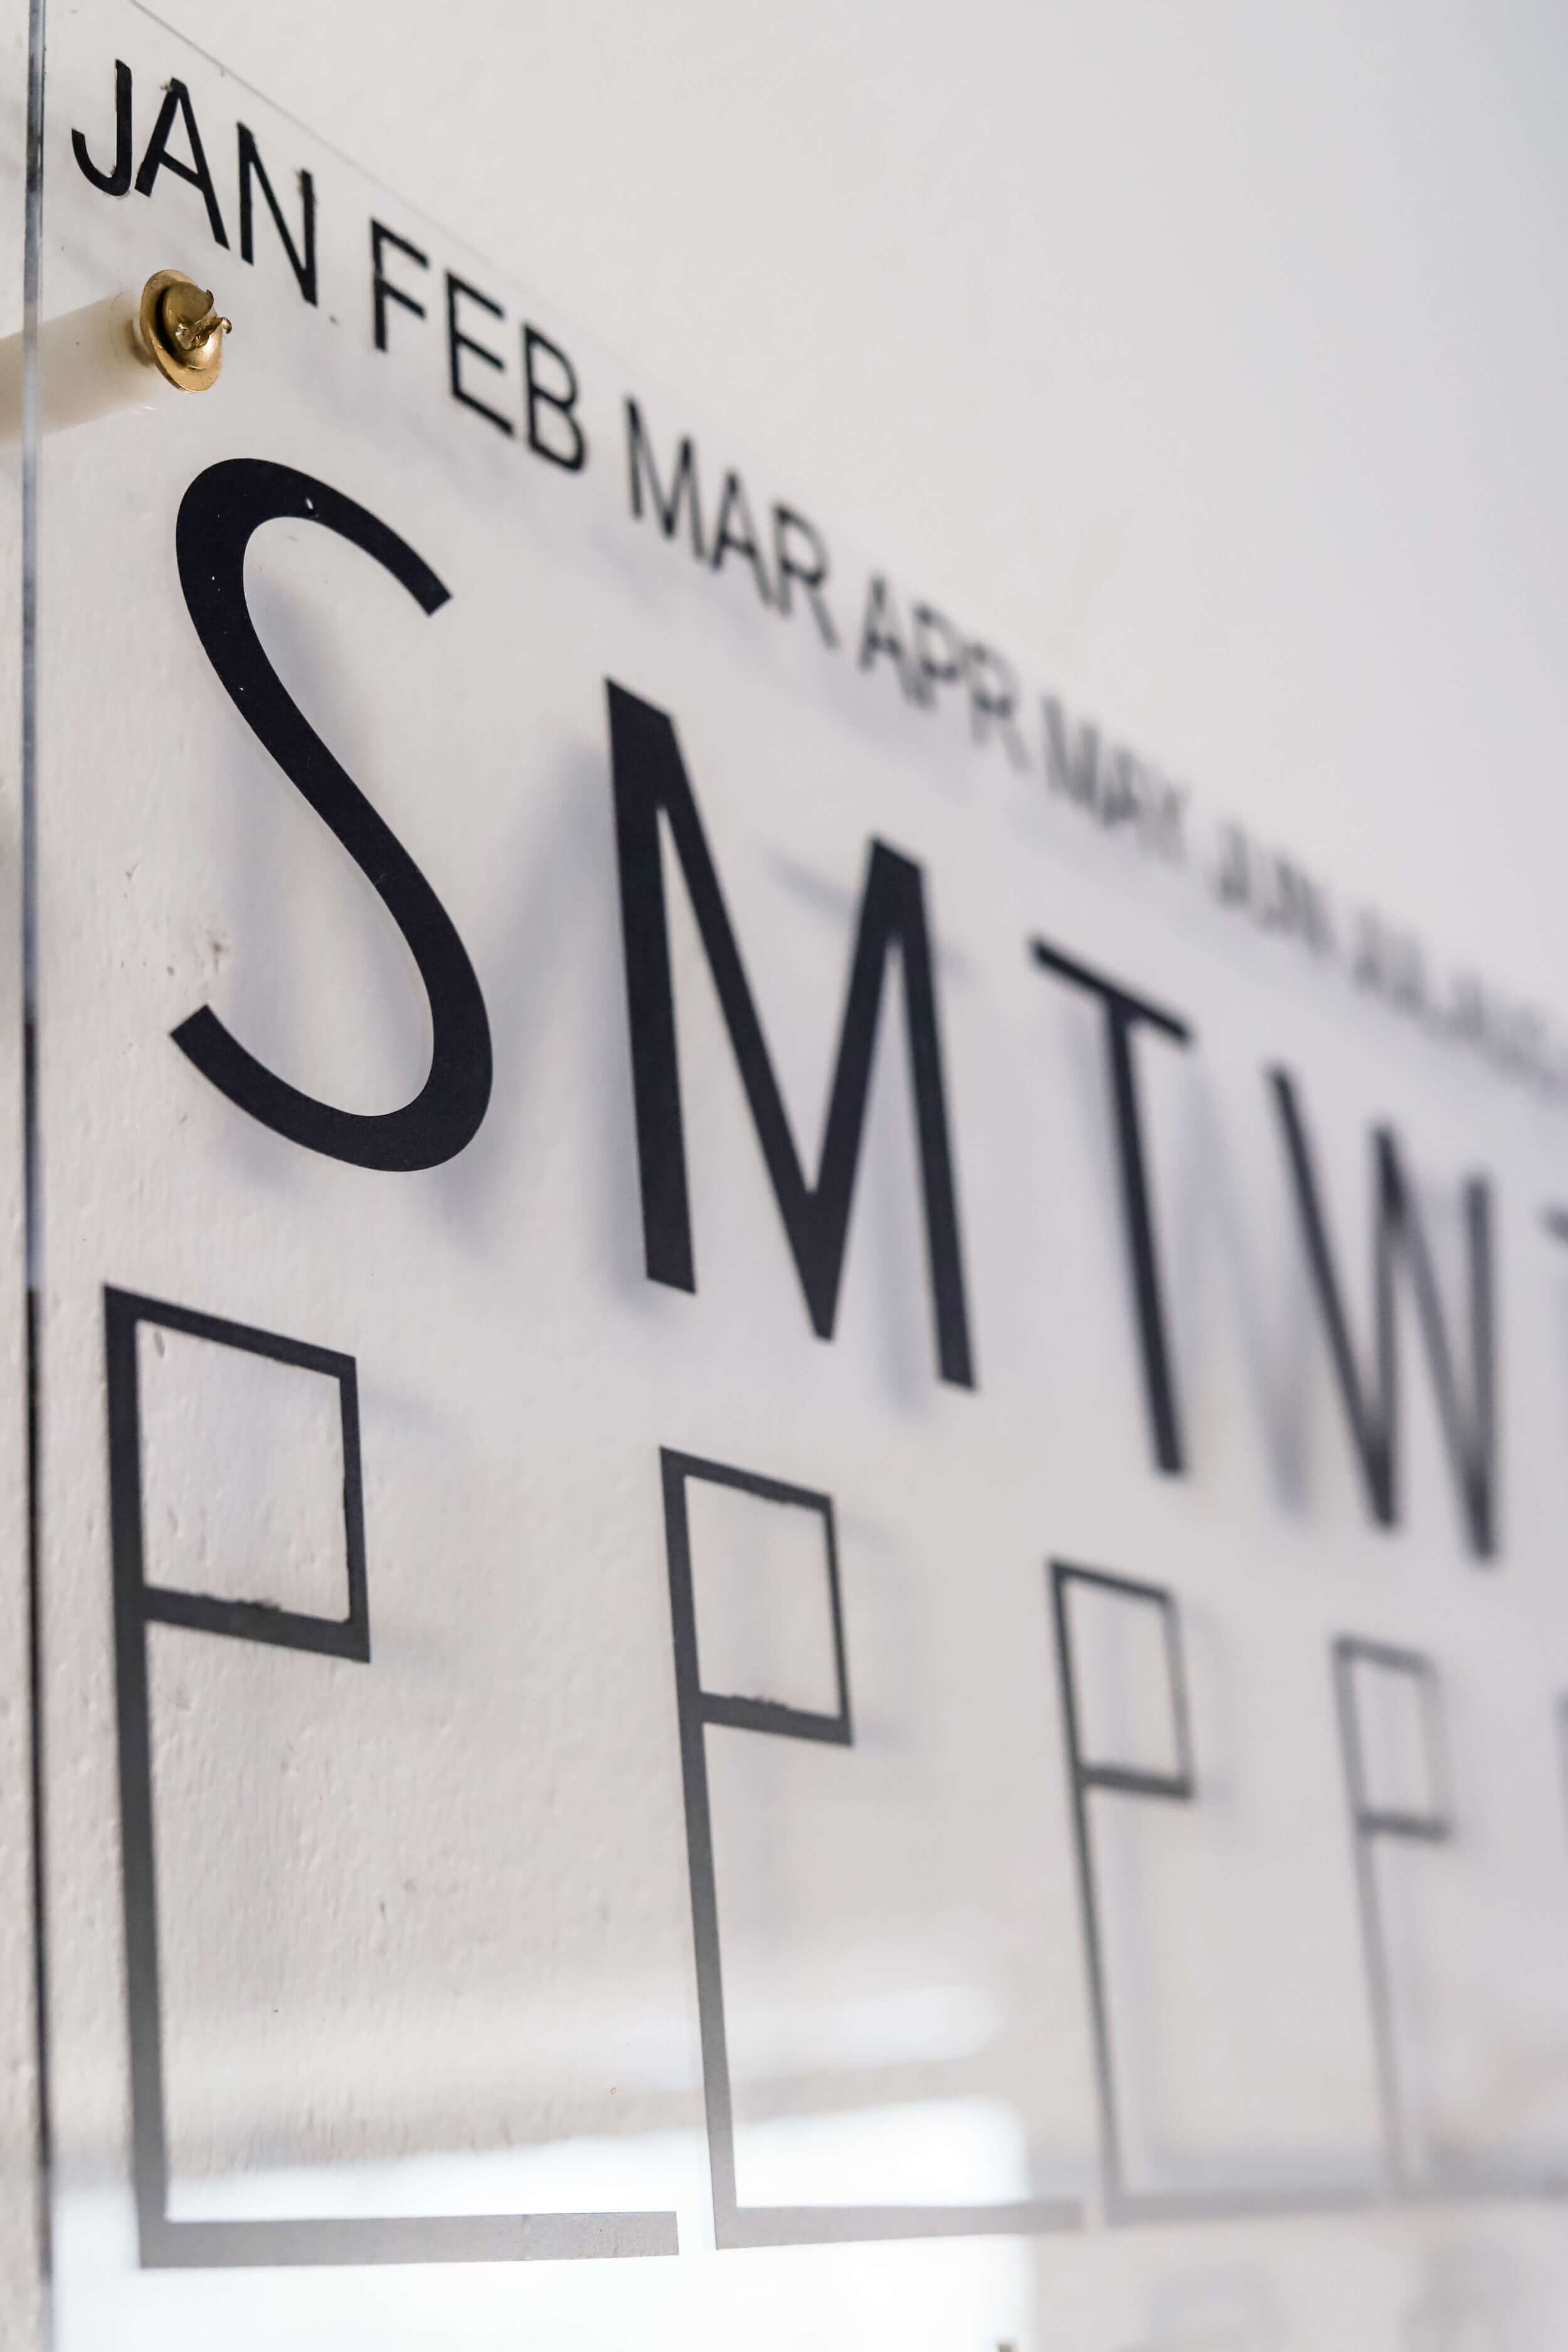
Perhaps one of the most requested posts that I’ve ever had is for this DIY dry erase calendar. A quick Google search will tell you that the finished large wall calendar version I was after is not cheap, ranging anywhere from $400-1000. I was able to find a transfer design via an Etsy shop and make my own at home, for a fraction of the cost! If you have a Cricut machine, there are many bloggers who have uploaded their own templates.
We’re not huge on DIY projects, but this made for a quick and simple weekend project. It just simply requires a bit of patience to make sure that your design is ready to apply!
Supplies:
30” x 36” acrylic sheet
1.4" x 1" Brass Flat Top Standoffs (not pictured, but recommended)
Drill + drill bit (we used 10mm)
Optional:
Shop:

Step One:
Remove the protective plastic coating from the acrylic sheet and make sure to clean it thoroughly for any dust or film residue that may be left on it from storage.
Step two:
Measure and mark where you want your standoffs to be. We placed ours approximately 1” from the edges of the acrylic sheet.
Step three:
Using the drill in reverse, slowly apply pressure to drill holes to match the size of the standoffs you ordered. Make sure to place the acrylic against a piece of wood for support and to protect the sheet from cracking.
Step four:
Line up your decal onto your acrylic sheet. The specific decal I used came in four pieces, so I applied Scotch tape to the pieces so they would not move during application. Make sure that you are happy with the placement of the decal before removing the protective film as it is very easy to destroy the decal. Apply slowly to acrylic.
Step five:
Using a credit card or flat object, remove air pockets from design and firmly apply pressure. Slowly peel off the backing tape to reveal decal.
Step six:
Mount your calendar on the wall using the holes you pre-drilled in the acrylic sheet as a guide. Use a level to make sure the calendar is aligned correctly. Screw in your standoffs and you’re done!
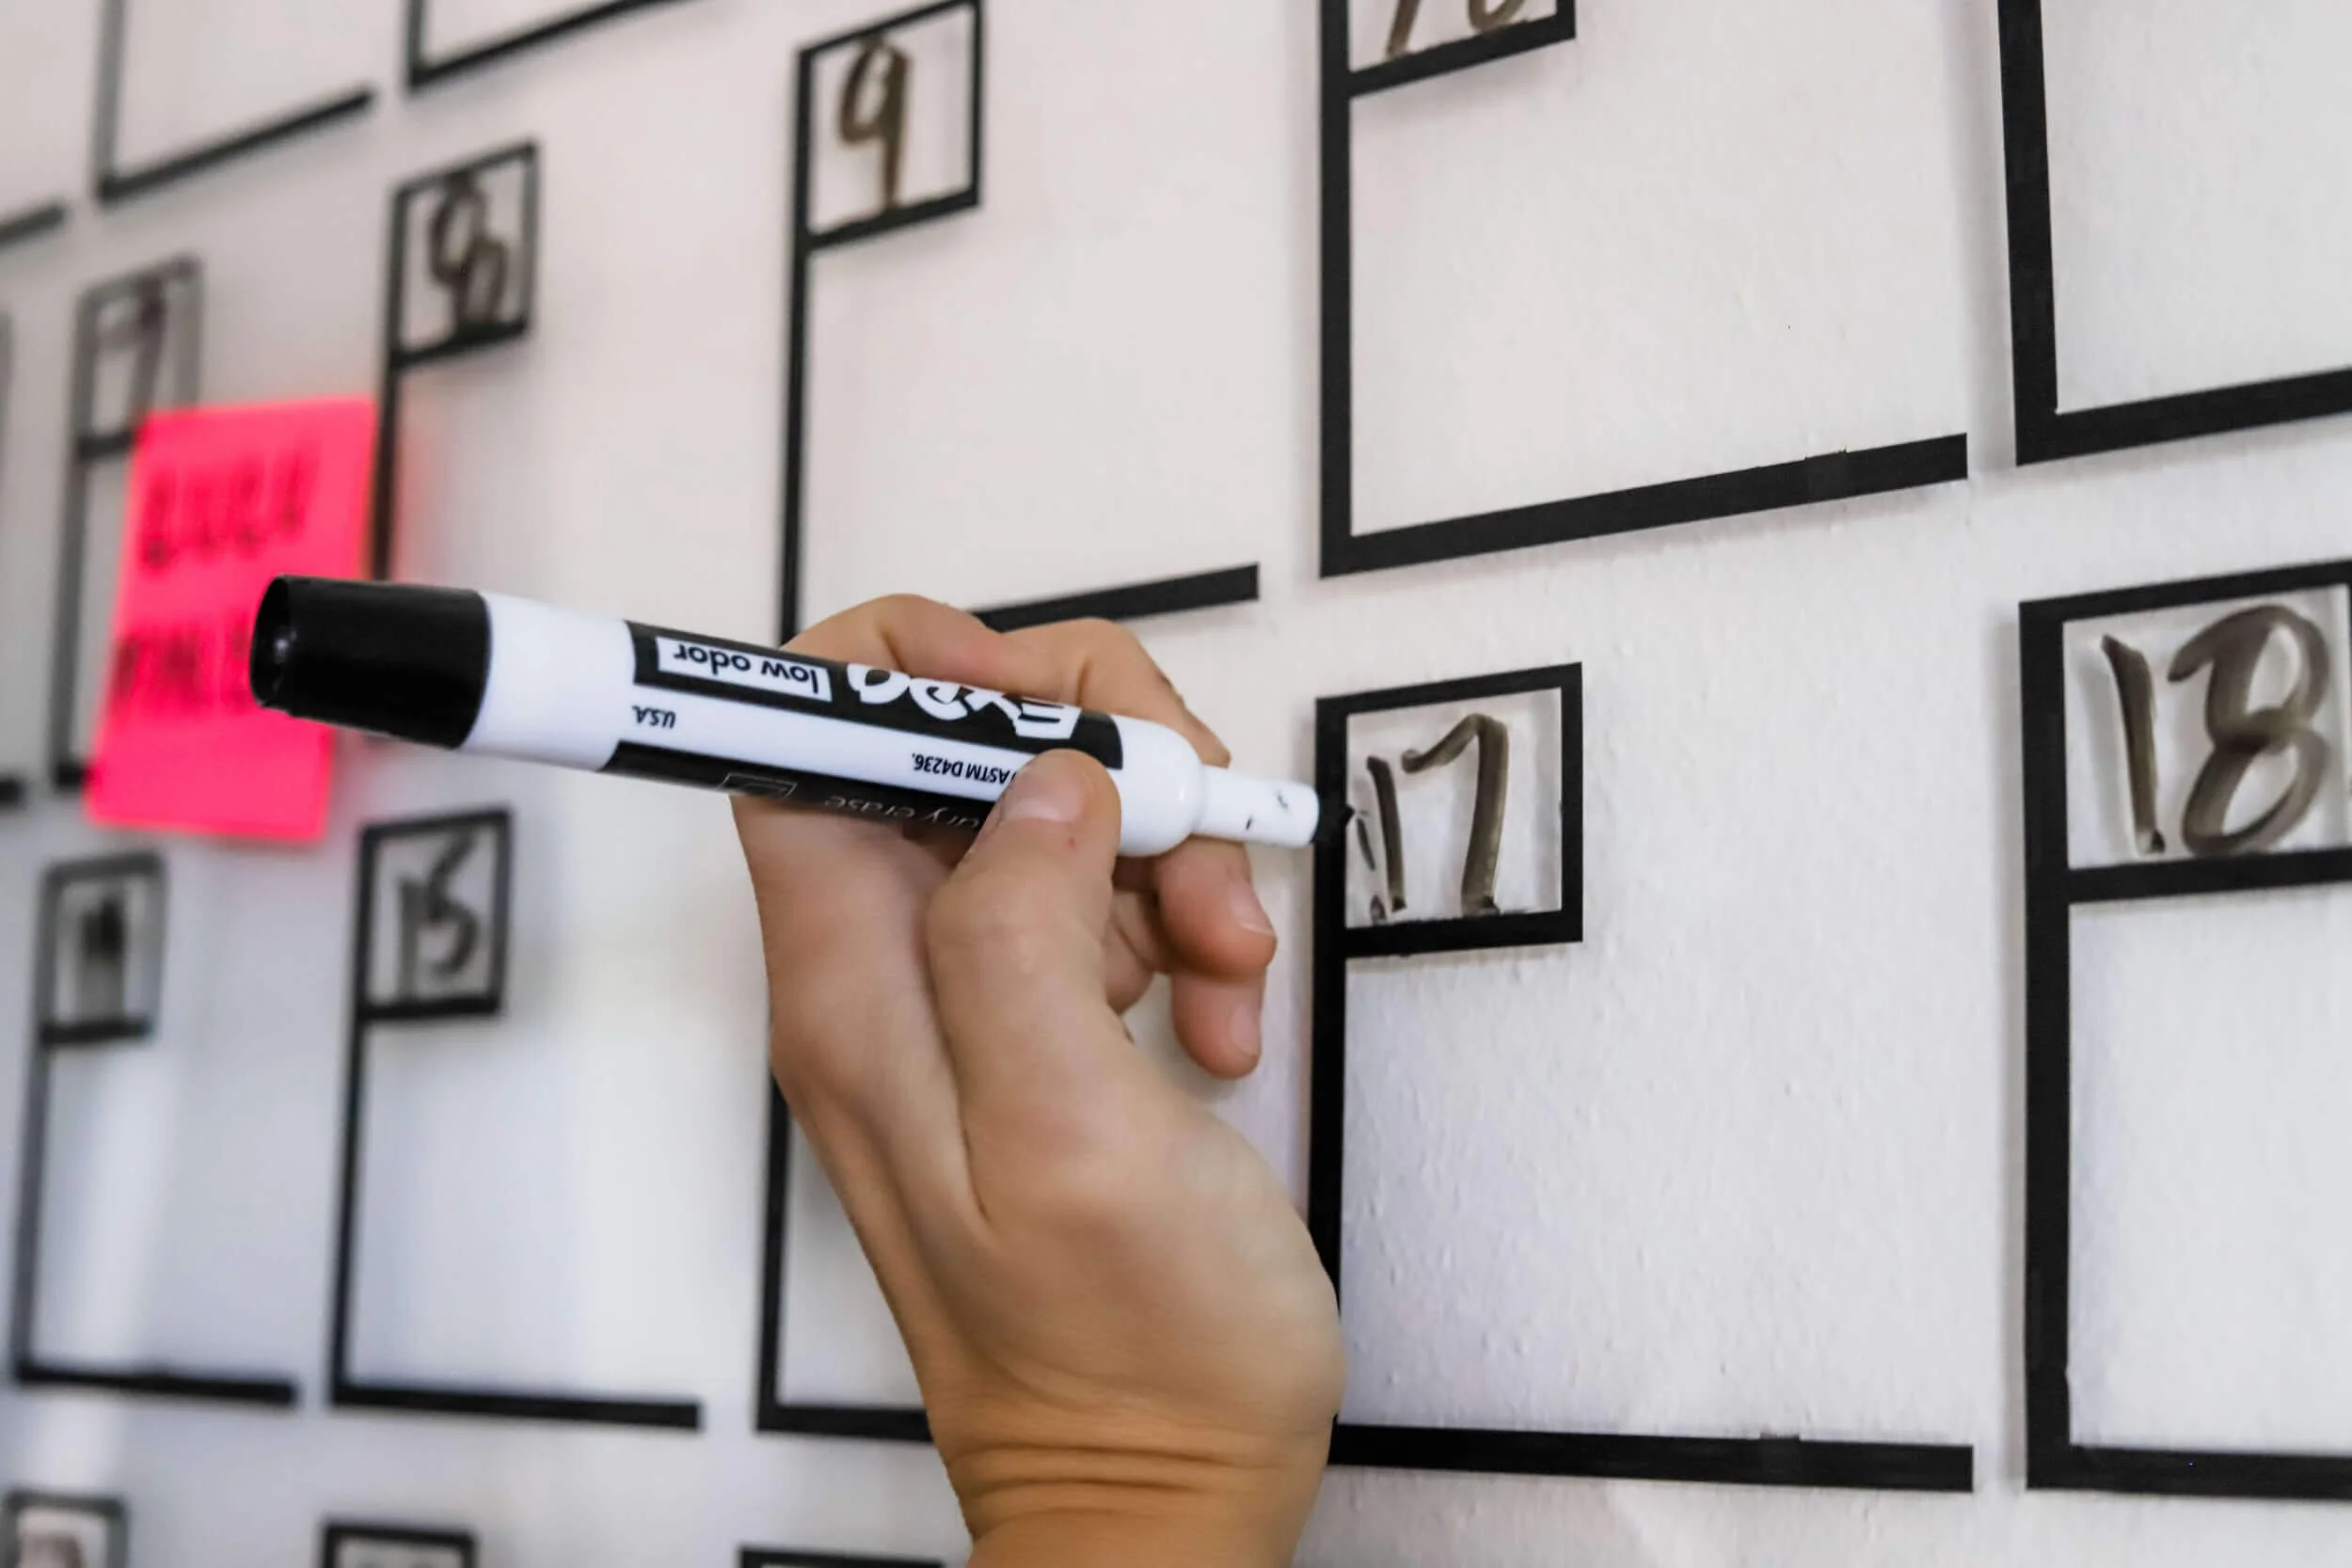
Note: The acrylic sheet is dry eraser marker friendly, but repeated use will cause the marker to leave behind a residue. We use Post-it notes to organize blog posts and content ideas by color coding based on theme. It’s an easy way to look at the monthly overview and change and adjust publish dates quickly.
If you’re not into DIY, but love the look, here are several finished acrylic calendars in various sizes and price points.