How To Get The Best Lighting For Zoom Meetings Every Time
This article may contain affiliate links. As an Amazon affiliate, we may earn a small commission for any purchases made through these links. Click here for the disclosure statement.
With more people working from home than ever, virtual Zoom conference calls have become a routine part of the daily work schedule. However, this abrupt switch to remote working has not been without its challenges. For many companies, the shift to working remotely has been a temporary solution until businesses and offices are allowed to operate fully again.
How to Get The Best Lighting for Zoom Meetings
Employees who have always gone to the office daily have been forced to create makeshift home offices, often at a kitchen table or in a spare bedroom.
The result? Virtual Zoom meetings are often conducted in poorly lit areas of the home, rending the video quality poor. While many have the ability of simply turning their camera off, most in virtual sales roles need to meet face-to-face to interact with customers and clients daily.
Looking to increase your video quality and look better on Zoom? These simple Zoom tips will allow you to nail your light every time for your next Zoom meeting.
Brighten Dark Videos
The first step on how to look better on Zoom is to change your lighting. Good lighting can make the difference between a dark, grainy video and a bright, high-quality one. If you are in an area of your home where the light is not good, if possible, move your home office to an area that has the most bright, natural light to help brighten dark videos. Natural light is one of the quickest and easiest ways to achieve good lighting.
If moving is not an option to correct your dark lighting problem, we’ll help you find the right setup to master lighting in even the darkest room in your house.
Find the Right Lighting Setup
If you’ve identified good lighting as your problem (which it likely is!), then the next step is selecting the right lighting setup for you.
If your lighting goal is simply to look your best on Zoom for office meetings and employee contact, you might want to make the best use of natural light.
If you’re in a customer-facing role, you might want to increase your lighting for video quality by choosing an affordable ring light to use with your webcam.
If you are someone who is creating video content for a company, such as YouTube training videos or vlogging, then a studio lighting kit will provide the best video lighting setup for you.
Still unsure what is the best setup for you? We’ll show you side-by-side examples of each lighting technique and let you decide.
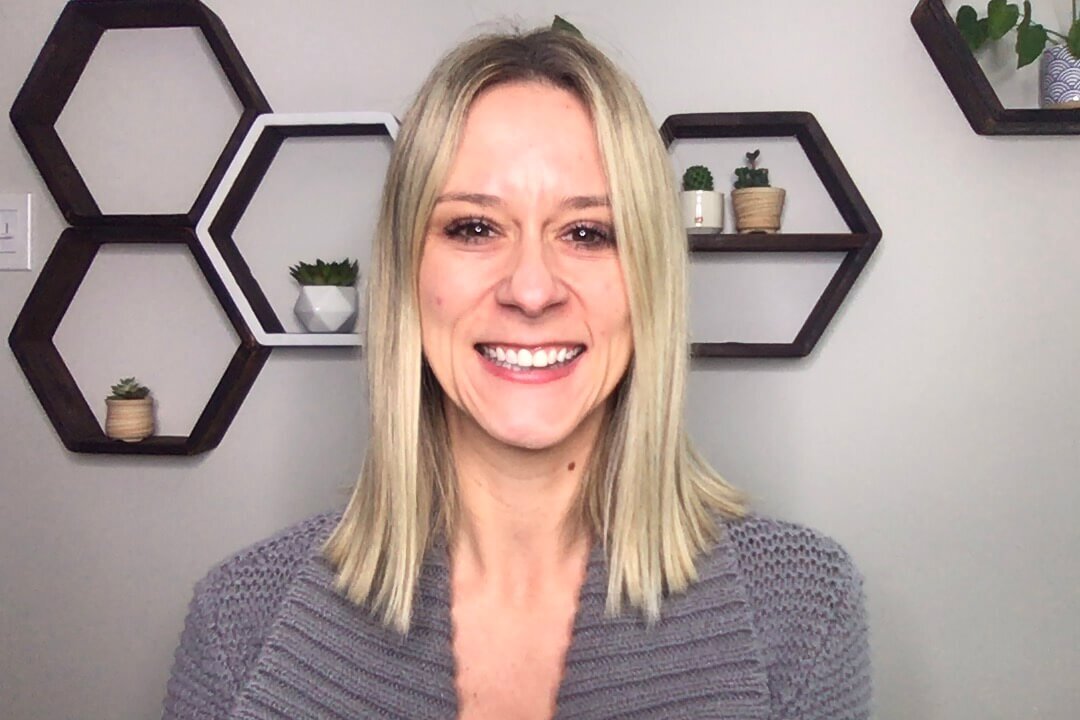
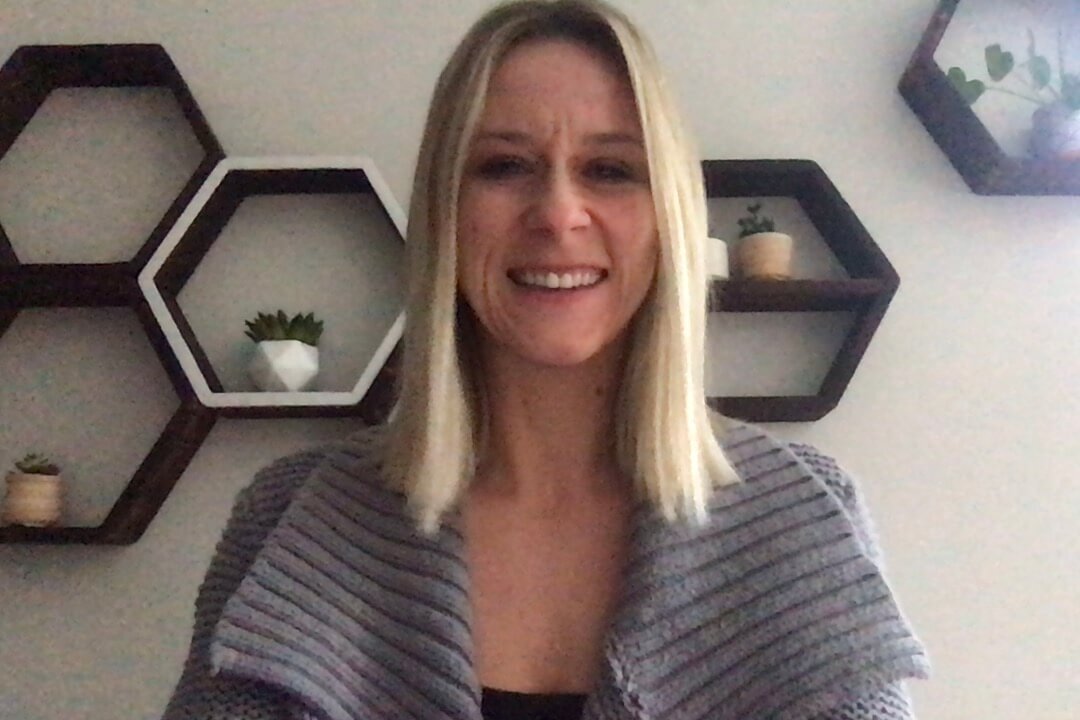
All photos are taken directly from a MacBook webcam, makeup and filter free, on the same day.
Natural Light
Standard Zoom camera
Natural light
If possible, start with as much natural lighting as possible. Consider natural lighting anywhere in your home that the room is bright enough to see and work comfortably without turning on any additional lights. Turn your desk or computer to face a window. The natural light from the sun will give you the front lighting you need to light up your face, as well as the background. Light from a sunny window will also look the most natural, meaning you won’t be the victim of unflattering shadows underneath your eyes or nose. Sunlight also helps to retain the colors in your video, as overly harsh artificial lighting will have a tendency to wash out the colors of your face if there is too much lighting or incorrect setup.
Pro tip: Avoid facing any window where the sun directly hits your face. This can cause harsh shadows underneath the eyes and nose—not to mention causing you to squint!
Standing desks are a great option for placing in front of a window, especially if you are someone who is frequently on video conference calls. Standing desks have an added benefit, as well. Sitting at a desk all day can wreck havoc on your lower back, hips, and even shoulders from poor posture. Most desks are not set up with proper ergonomics in mind, including, but definitely not limited to: proper monitor and chair height, neck positioning, and even optimal equipment spacing. Plus, looking down at your computer’s webcam for your Zoom meetings can create an unflattering angle on anyone.
Ring Lights
Ring lights (also known as circle lights or circle lighting) can be an excellent (and affordable!) option to get the best lighting for your video, especially when in a dark room. One of the main benefits of ring lighting is that it provides a full 360 degrees of light, which is ideal for facial lighting. This means that your camera lighting is going to be more even, allowing you to create fewer shadows around your eyes, nose and chin. For most, looking your best on Zoom means getting as much face lighting as possible.
While you can use ring lights for a variety of different lighting situations, they are most commonly placed directly in front of the individual, with the light in line with your face. This prevents the ring light from being positioned too high or too low. Doing so can cause unflattering shadows across the face.
What is the Best Ring Light for Zoom Meetings?
As with all of our lighting examples, the best ring light for Zoom is going to depend on both your budget and your goals. Cheap ring lights will provide lesser light and fewer color and brightness settings to change your lighting. However, if you travel frequently or work from multiple locations, a small ring light is your best option.
More expensive ring lights may offer more customizable options (such as dimming capabilities or height adjustments), but may be heavier and less portable than small laptop lights or selfie rings lights. These larger tripod ring lights are better suited for home offices where they do not have to be moved often.
Ultimately, choosing the best ring light is going to come down to you selecting the option that provides the best lighting while staying within your budget. For this purpose, Amazon offers one of the largest selections of ring lights to choose from.
How Much is a Ring Light?
Ring lights can range anywhere in price from a $10 clip-on laptop option to upwards of $100 for more professional ring light kits.
Read more: Useful Gifts for People Who Work From Home
Standard Zoom camera
Clip-on Ring Lights
Mini ring lights are the go-to option if you’re looking to get the best selfie lighting. These small ring lights clip on to your computer’s webcam or your cellphone camera and provide a low level of light. This may be all you need to brighten dark videos or photos. However, many of these clip-on lights have batteries with short life spans and often cannot be replaced, requiring you to buy a new one each time. While nowhere near the top end of choices for front lighting, these small clip-on ring lights are the most affordable option on the list for those who want to get better camera lighting but are on a strict budget (A great gift idea for college students!).
Desktop ring light options
When you enter the $25-$50 price range of ring lights, it opens up a variety of options. Many of these smaller ring lights come on a tripod and are very portable options for your desk or laptop setup. One of the biggest benefits of this style of ring light is that you can adjust the angle of your lighting since they are not connected to your computer. Many options also have variable brightness settings and some smaller right lights also have warm and cool settings (like the one pictured above). Since these mid-size ring lights are larger—most vary in size from 6” to 12” in diameter—it also offers the ability to act as a phone or camera stand as well, a great option for those that often do Zoom calls via cellphone.
Most tabletop ring lights can also connect to your computer via USB port, allowing you to move your laptop without being tethered to an electrical outlet. If you are looking for a higher quality light for Zoom meetings without breaking the bank, this would be our lighting solution for you.
Standard Zoom camera
18 Inch Ring Light
The largest ring light option is also the most expensive. These 18” ring lights are most frequently used by vloggers and YouTubers, specifically those looking to achieve beauty lighting for makeup tutorials. These large standing ring lights will have the most features, including LED lights, full dimming capabilities, adjustable stands, and color panels to achieve any lighting look you want. More expensive options are also much more durable and can easily support not just camera phones, but the weight of large DSLR cameras, too.
The downside to these larger ring lights, aside from the price, is that they are bulkier and require much more setup. They also need to be plugged in to an electrical outlet.
The best ring light in this category, in our opinion, is the Neewer Ring Light Kit . At just under $100, it is one of the most cost-effective large ring lights, while boasting a huge array of features. It has a large 18” ring light and a soft tube stand which has a bendable neck and adjustable tripod to adjust the ring light to any angle in order to achieve the perfect lighting. The LED lights also have reflective layers embedded which softens the light, even on the brightest setting. It also comes with orange panels (for warmer lighting) and a convenient carrying case.
Normal Zoom camera
Studio lighting with fill and back light
Studio Lighting
For those looking for the highest quality home lighting, studio lighting setups will be your best friend. Many studio kits come with three lights—one key light and two fill lights—to create a three point lighting system. Other kits may provide only two fill lights, allowing you to choose the key light of your choice. By using studio lights, you are completely in control of your lighting and it is one of the main lighting techniques to rid your video of unwanted shadows.
How to Use Key Lights and Fill Lights
(There are many more professional and in-depth studio lighting tutorials available online. This is a brief overview.)
The two main light sources you will use in studio lighting are key lights and fill lights. Ultimately, there is no “wrong” way to set up your three point lighting, since each variation of your light source will create a different effect, mood, or depth. However, for the purposes of Zoom video, this is our recommendation for setup.
A key light is the main source of light in your video. The main objective of the key light is to illuminate the subject—in this case, provide lighting on the face. For this reason, the key light should be the brightest light in your setup. Often, this is accomplished by using a ring right. Since your goal is not to wash out the face or create too much lighting, the most common position of the key light is 45 degrees to the subject. This allows you to light the subject without harsh lines and create a softer look when you add in the fill lights.
Fill lights are the second light in your setup and they are meant to do as the name implies: fill the missing light. For most video lighting setups, the fill light will be set up opposite from the key light. This illuminates the opposite side of the face from the key light and “fills” any shadows that the key light may have created. While most often fill lights are about 50% of the intensity of the key light (and often diffused), if you want a more even look, you can set the fill light to be more closer in intensity to the key light.
The third light in your three point lighting setup is the backlight. Back lights, much like fill lights, are exactly as the name implies. Back lights provided lighting from behind, which helps to provide depth and dimension to your video. The back light is often set up on the same side as the key light, although, again, this can be adjusted to get your desired filming result.
Standard Zoom camera
Ring light with back lighting
Ultimately, studio lighting kits give you the most control over your video lighting. Even though they are a great source of customizable lighting for home offices, these lights may be too big for small spaces and too complex to set up quickly. However, for those who may have to lead lengthy training videos or need to record their Zoom calls, studio lighting may be a worthwhile investment.
Get the Right Lighting Angles
Of course, regardless of the type of lighting that you use, finding the right angle for face lighting could arguably be more important. The angle of both the lighting and of the camera will have an effect on just how good you look on Zoom.
Camera too low
Camera too high
Use a Flattering Camera Angle
Did you notice anything about every photo in the above examples? Each one of them was taken from a standard computer camera position. One of the most common errors that most people make when it comes to Zoom calls is not adjusting the angle of their camera. Most desks, regardless of whether you are at home or in the office, are lower than your eyesight.
If the camera is too low, you run the risk of giving everyone a view up your nose or you overcorrect and artificially create that dreaded “double chin” look as your head tilts downward. Not only is this angle incredibly unflattering, it inevitably causes you to slump forward and crane your neck. This poor posture leads to neck, shoulder, and back muscle aches. Correct this unflattering camera angle and poor posture by setting your desk up in the best ergonomic position.
Natural lighting good angle
Ring light good angle
Studio lighting good angle
Start by adjusting your workstation so that your monitor is directly in front of your face so that you don’t have to look downwards. Look first at your chair height. Is it too low? Too high? You can adjust the height of your monitor by placing it on a stand that lifts it to eye level. If you prefer a standing option, there are many options for desktop risers that allow you to take your desk from sitting to standing. Make sure that even when you stand, you keep your monitor at eye level.
As we mentioned above, you can also invest in a full standing desk and completely rid yourself of sitting in a chair all day long.
Regardless of the option that you choose, keeping the camera directly in front of your face will offer the most flattering angle for you, regardless of your lighting setup.
Standard Zoom camera
Light too high
Avoid Dark Shadows
If you adjusted the angle of your camera and are still struggling with dark shadows, next look at your light setup. If the overall scene is dark, then you need a brighter light source.
If one side of your face is too dark, then you want to “fill” that shadow by turning on another light in the room to brighten the dark areas. Another potential solution is to adjust the angle of the main source of light so that it is more directly in front of you and can evenly light your face.
If there is too much overhead lighting, you will see dark shadows across your eyes, nose, and chin. If there is too much under lighting, you might find yourself looking like something straight out of a scary movie.
Glare from ring light
Angled light without fill
Light bounced from wall
Eliminate Glare on Glasses
As anyone who wears glasses knows, the glare that comes from any direct lighting is the bane of their existence. But how do you correct this annoying glare?
The answer comes in just how you angle the lights. Any direct lighting, whether it is from a natural or artificial source, will cause a reflection to appear in the glasses. The key is to create soft lighting on the subject that diffuses from the source of the light. By doing so, you create less of a focal point for the glasses to reflect.
Tip: Keep in mind that the style and coating of your glasses will ultimately play the largest role in effectively defeating glare.
There are several ways in which you can diffuse the light to avoid the lighting glare in your glasses.
Bounce the Light Off a Wall
If your desk faces a wall, this might be one of the simplest (and cost effective!) ways to reduce glare in your glasses. Instead of placing the ring light directly in front of you, place the ring light behind you and to an angle, pointing the light at the wall. The light will reflect off the wall and onto your face, diffusing the light and preventing the glare on your glasses.
Tip: To effectively do this, you will need a higher powered light source to bounce enough light back onto your face. If you don’t want to purchase a ring light, you could use any dimmable household white light that you can point directly at the wall. Adjust the light as necessary.
Turn the Brightness Down on Your Computer
We often forget how much light is sent directly at us when we are looking at our screen. If you still see glare on your lenses, dial down the brightness of your monitor until it diffuses the light reflection.
Adjust the Angle of the Ring Light
If the light is pointed directly at your face, the distracting glare from your glasses is going to be unavoidable. Instead, move your ring light up and to the side of your face. This setup would be similar to the key light position in the studio lighting kit, as it would diffuse the light across your face from an angle. However, positioning the light at an angle can cast shadows across the opposite side of your face (shown above). To correct this, you would want to use a fill light to add light to the opposite side of your face. This could be from a secondary light source or a window.
Soften & Diffuse the Light
The last option would be to soften the source of the light. You can achieve this by adding a diffuser to your ring light, most specifically in the form of a softbox or diffusing sock. You could also achieve this same look by putting a light piece of fabric or plastic bag over the light source. Optionally, moving the light farther back from your face will also help to reduce the sharpness of glare across your face.
So What Is the Best Lighting?
Ultimately, there is no best lighting. Using smaller ring lights or natural light to your advantage are the best options for those on a budget. If you’re willing to spend more money, you can experiment with an endless array of lights and positions to create the perfect lighting for you. The trick is to play around with the above options until you find a combination that works for you. When you do, stick with it!


